Never worry about leaving your 'proper' camera at home again. When you purchase through links on our site, we may earn an affiliate commission. Here’s how it works. As a professional photographer who uses some of the best cameras, I never thought I'd ever say something like this – smartphones are amazing tools for photography. There plenty of apps that can help you to plan shoots, find locations and share your work, and most of all you have a high-quality camera in your pocket, with you at all times. We've even curated a best cameraphone guide to help you pick the right one.
![[Photo of a pier taken with a Samsung Galaxy Ultra smartphone after editing in Adobe Lightroom Mobile]](https://cdn.mos.cms.futurecdn.net/DWfmK9ZHreoATWktJAPx79-320-80.jpg)
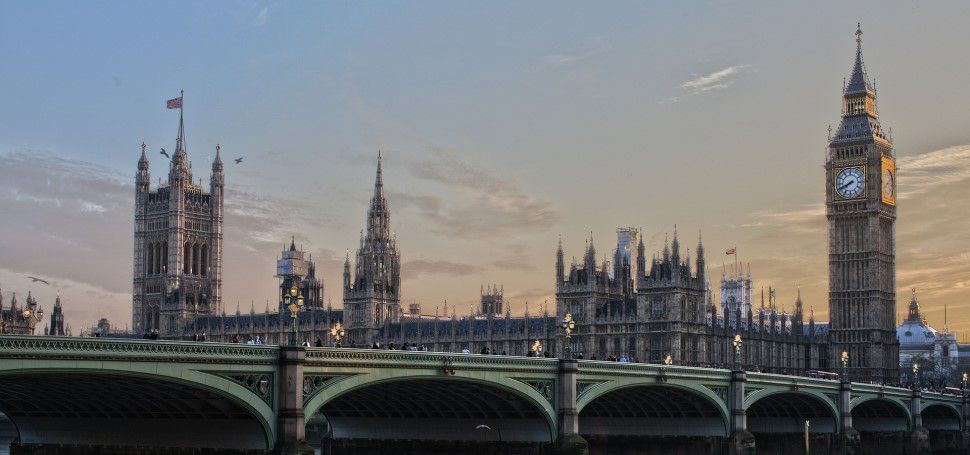
If you're a serious photographer like me yet often find yourself out and about without your mirrorless camera, it's your trusty smartphone that has to pick up the slack. I still believe my Samsung Galaxy S23 Ultra isn’t anywhere near as good as my professional camera kit, but by shooting in raw image format – yes, most flagship smartphones can capture in raw – and processing photos in Adobe Lightroom Mobile, it's possible to achieve professional image quality, like I was able to recently (see below).
![[Samsung Expert Raw camera view]](https://cdn.mos.cms.futurecdn.net/8m9RTxXtdXHGsgNJDwGKZ8-320-80.jpg)
Raw format enables you to make changes to color and exposure in a way that you can't with the default JPEG / HEIF format, especially with a powerful mobile editor such as Adobe Lightroom Mobile. Many smartphone can capture in raw format, usually in a Pro mode.
![[Photo of a pier taken with a Samsung Galaxy Ultra smartphone before editing in Adobe Lightroom Mobile]](https://vanilla.futurecdn.net/cyclingnews/media/img/missing-image.svg)
As a Samsung Galaxy 23 Ultra owner, I can also capture in this format using the Expert Raw app, which has to be downloaded from the Galaxy Store. Expert Raw provides manual, semi-automatic and automatic control of the camera settings depending on preference. I usually shoot in manual, but sometimes use Auto ISO and Auto White Balance in low light conditions with mixed light sources.
Expert Raw can capture 12MP and 50MP 16-bit raw files in DNG format, but the caveat here is that at 12MP you can shoot in UW (ultra-wide), W (wide), T (telephoto) and ST (super telephoto) while 50MP is only available in W (wide). 12MP provides a print size of just over A4 and plenty of resolution for online use, plus it also allows you to shoot in the phone's astrophotography and multiple exposure modes.
![[Editing a Raw smartphone photo in Adobe Lightroom Mobile]](https://cdn.mos.cms.futurecdn.net/FTj848tBb6JpXZphFmpaaY-320-80.jpg)
– A smartphone with a Pro mode and raw capture. – An app that can process raw files, such as Adobe Lightroom. – Potentially a support to steady your phone. – Some edits require Adobe's paid subscription Photography plan. Shooting in Expert Raw is no different than shooting with the Galaxy Ultra's standard camera app in Pro mode. Most smartphones will have an equivalent Pro mode. You can leave all of the camera settings in auto, a mixture of auto and manual or set everything to manual. Since the aperture in smartphone cameras is fixed, you won’t have to worry about this. Most apps also allow you to view a live histogram to aid exposure if you find this useful.
![[Editing a Raw smartphone photo in Adobe Lightroom Mobile]](https://cdn.mos.cms.futurecdn.net/GQAMYoE2PY5GJMpabwZRbY-320-80.jpg)
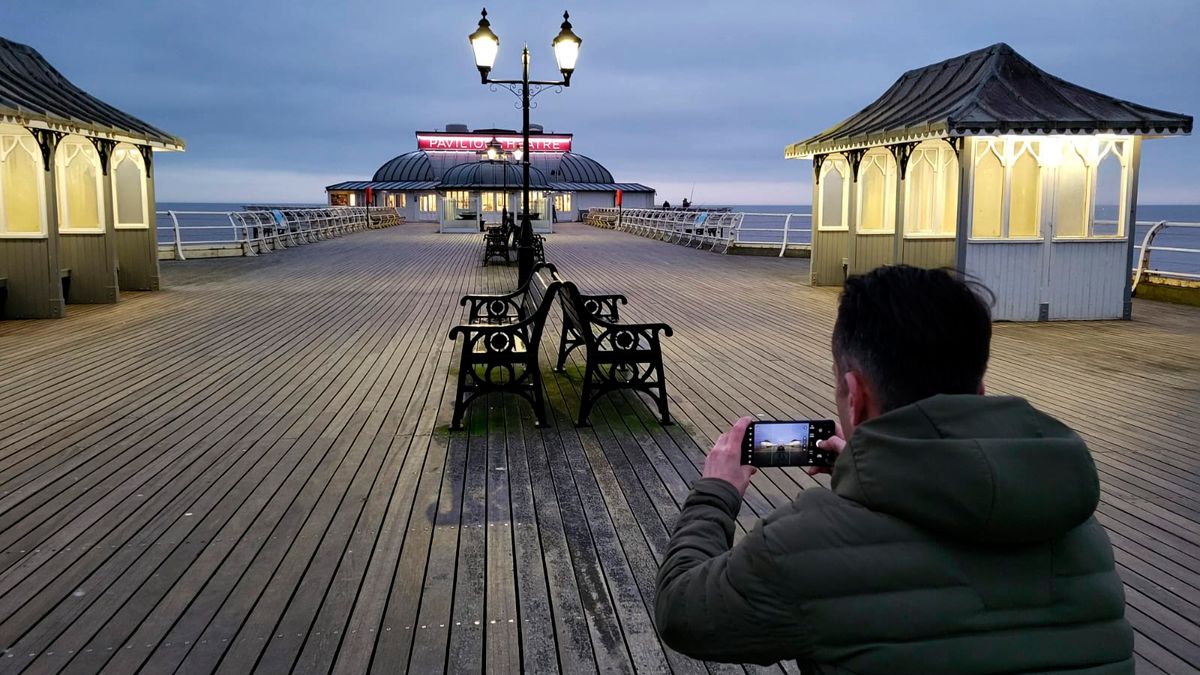
All you need is your smartphone with raw capture and for this example, Adobe Lightroom Mobile (there are powerful alternatives too). If you'd like to shoot long exposures which can improve low light image quality and get creative effects, you'll need to fix your phone to a support, such as a tripod. For most people, shooting handheld is the way to go because by the time you're adding additional kit like a tripod, you may as well be carrying a full camera kit. However, if you only shoot with a phone, a phone tripod mount and an ultra-lightweight travel tripod could be a worthwhile investment.
![[Editing a Raw smartphone photo in Adobe Lightroom Mobile]](https://cdn.mos.cms.futurecdn.net/ifaZamKrTZuuMdMZ4ZtAcY-320-80.jpg)
Sign up for breaking news, reviews, opinion, top tech deals, and more. The final image here was edited in Lightroom Mobile on my Samsung Galaxy S23 Ultra, but the screengrabs below were taken from an Android tablet to provide larger landscape format grabs that are easier to view here. The same settings were copied from my phone to the tablet to ensure the results are identical.
![[Editing a Raw smartphone photo in Adobe Lightroom Mobile]](https://cdn.mos.cms.futurecdn.net/YJY5oHj7RWgv95boRJGrcY-320-80.jpg)
Some shots will need to be cropped slightly while others, like this one, will require perspective correction. This is achieved simply by clicking on the highlighted button to correct vertical and/or horizontal distortion. Lightroom Mobile includes lens profiles for some phones, so head to Optics within the Adjustments tab and click on Enable Lens Corrections. This can be adjusted further using the Distortion Control slider if necessary; a grid appears to assist.
![[Editing a Raw smartphone photo in Adobe Lightroom Mobile]](https://cdn.mos.cms.futurecdn.net/LPXQNdzHxpJjTPeGJAjuSY-320-80.jpg)
Click on the Color option within the Adjustments tab and you can either use the White Balance profiles or adjust The Temp and Tint sliders manually. For this shot, setting the Temp to 4300 and Tint to 0 produced the best result. Click on the Light option in the Adjustments tab and make any adjustments as required to Exposure, Contrast, Highlights, Whites and Blacks. The Tone Curve is best for adding contrast but this is a high contrast scene so the Contrast slider was simply set to 10 to avoid losing detail, especially the highlights.
![[Editing a Raw smartphone photo in Adobe Lightroom Mobile]](https://cdn.mos.cms.futurecdn.net/vpFZz4ue7wa7ysHhN25aZY-320-80.jpg)
This shot was taken at ISO 3200, so there's some luminosity noise present. To deal with this grainy type of noise, click on the Noise option within Detail and increase the Noise Reduction slider. Color noise is dealt with by a default automatic setting.
![[Editing a Raw smartphone photo in Adobe Lightroom Mobile]](https://cdn.mos.cms.futurecdn.net/Bpai2cNTdN5QbMXQR9HebY-320-80.jpg)